
Pyrosales have been asked numerous times, “How do I connect MICC/Pyro cable to a Soft Skin cable”. This process is not common, but we had to create a way to assist our customers, so we made a kit that would join the cables together.
MICC cable Mineral-insulated copper-clad cable, colloquially known as pyro cable provides the ideal solution for fire protection. It is an electrical cable made from copper conductors inside a copper sheath, insulated by inorganic magnesium oxide powder.

Soft–skin flame retardant cables consist of single or multi-stranded conductor cores (copper), individual core insulation (polymer) and an outer insulating sheath (polymer).
Pyrosales call this joining MICC cable to Flex cable (soft Skin), there is a single core join or a multi core join. If you follow the instruction this will enable a join to be completed which maintains the cable circuits integrity under electrical conditions. When ordering the parts, you will require the size of the cable to ensure you receive the correct components.
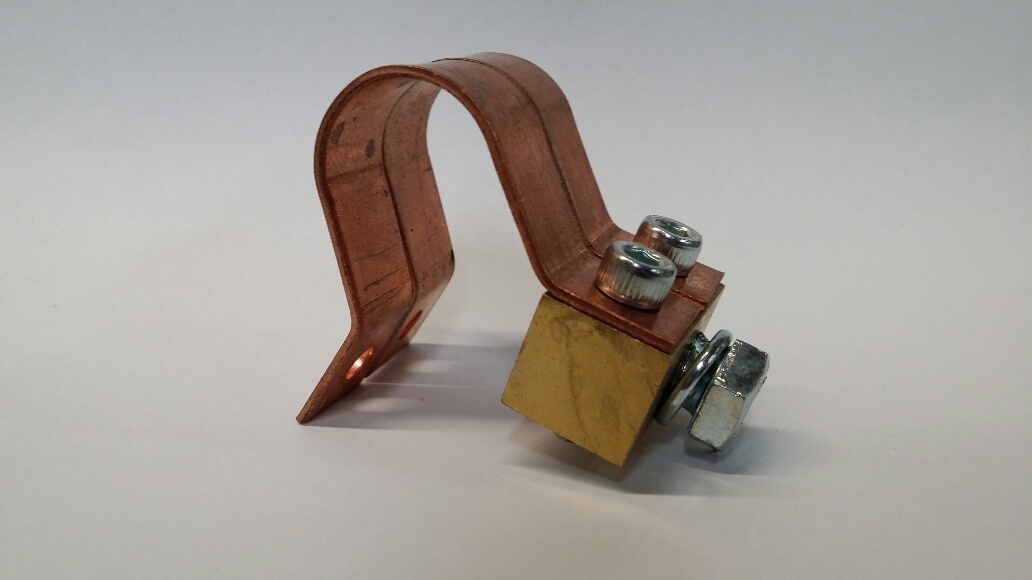 Earth Continuity: When installing an MICC to Flex joint, you need to ensure that you maintain the earth continuity. As the MICC sheath is the earth you will need an Earth Bonding Clamp and organise to terminate a flying cable to the extended Flex cable. Pyrosales carries a full range of earth bonding clamps for this application.
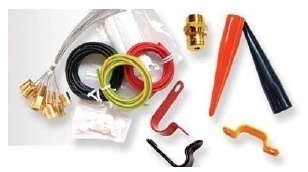
The Single Core kits consist of:
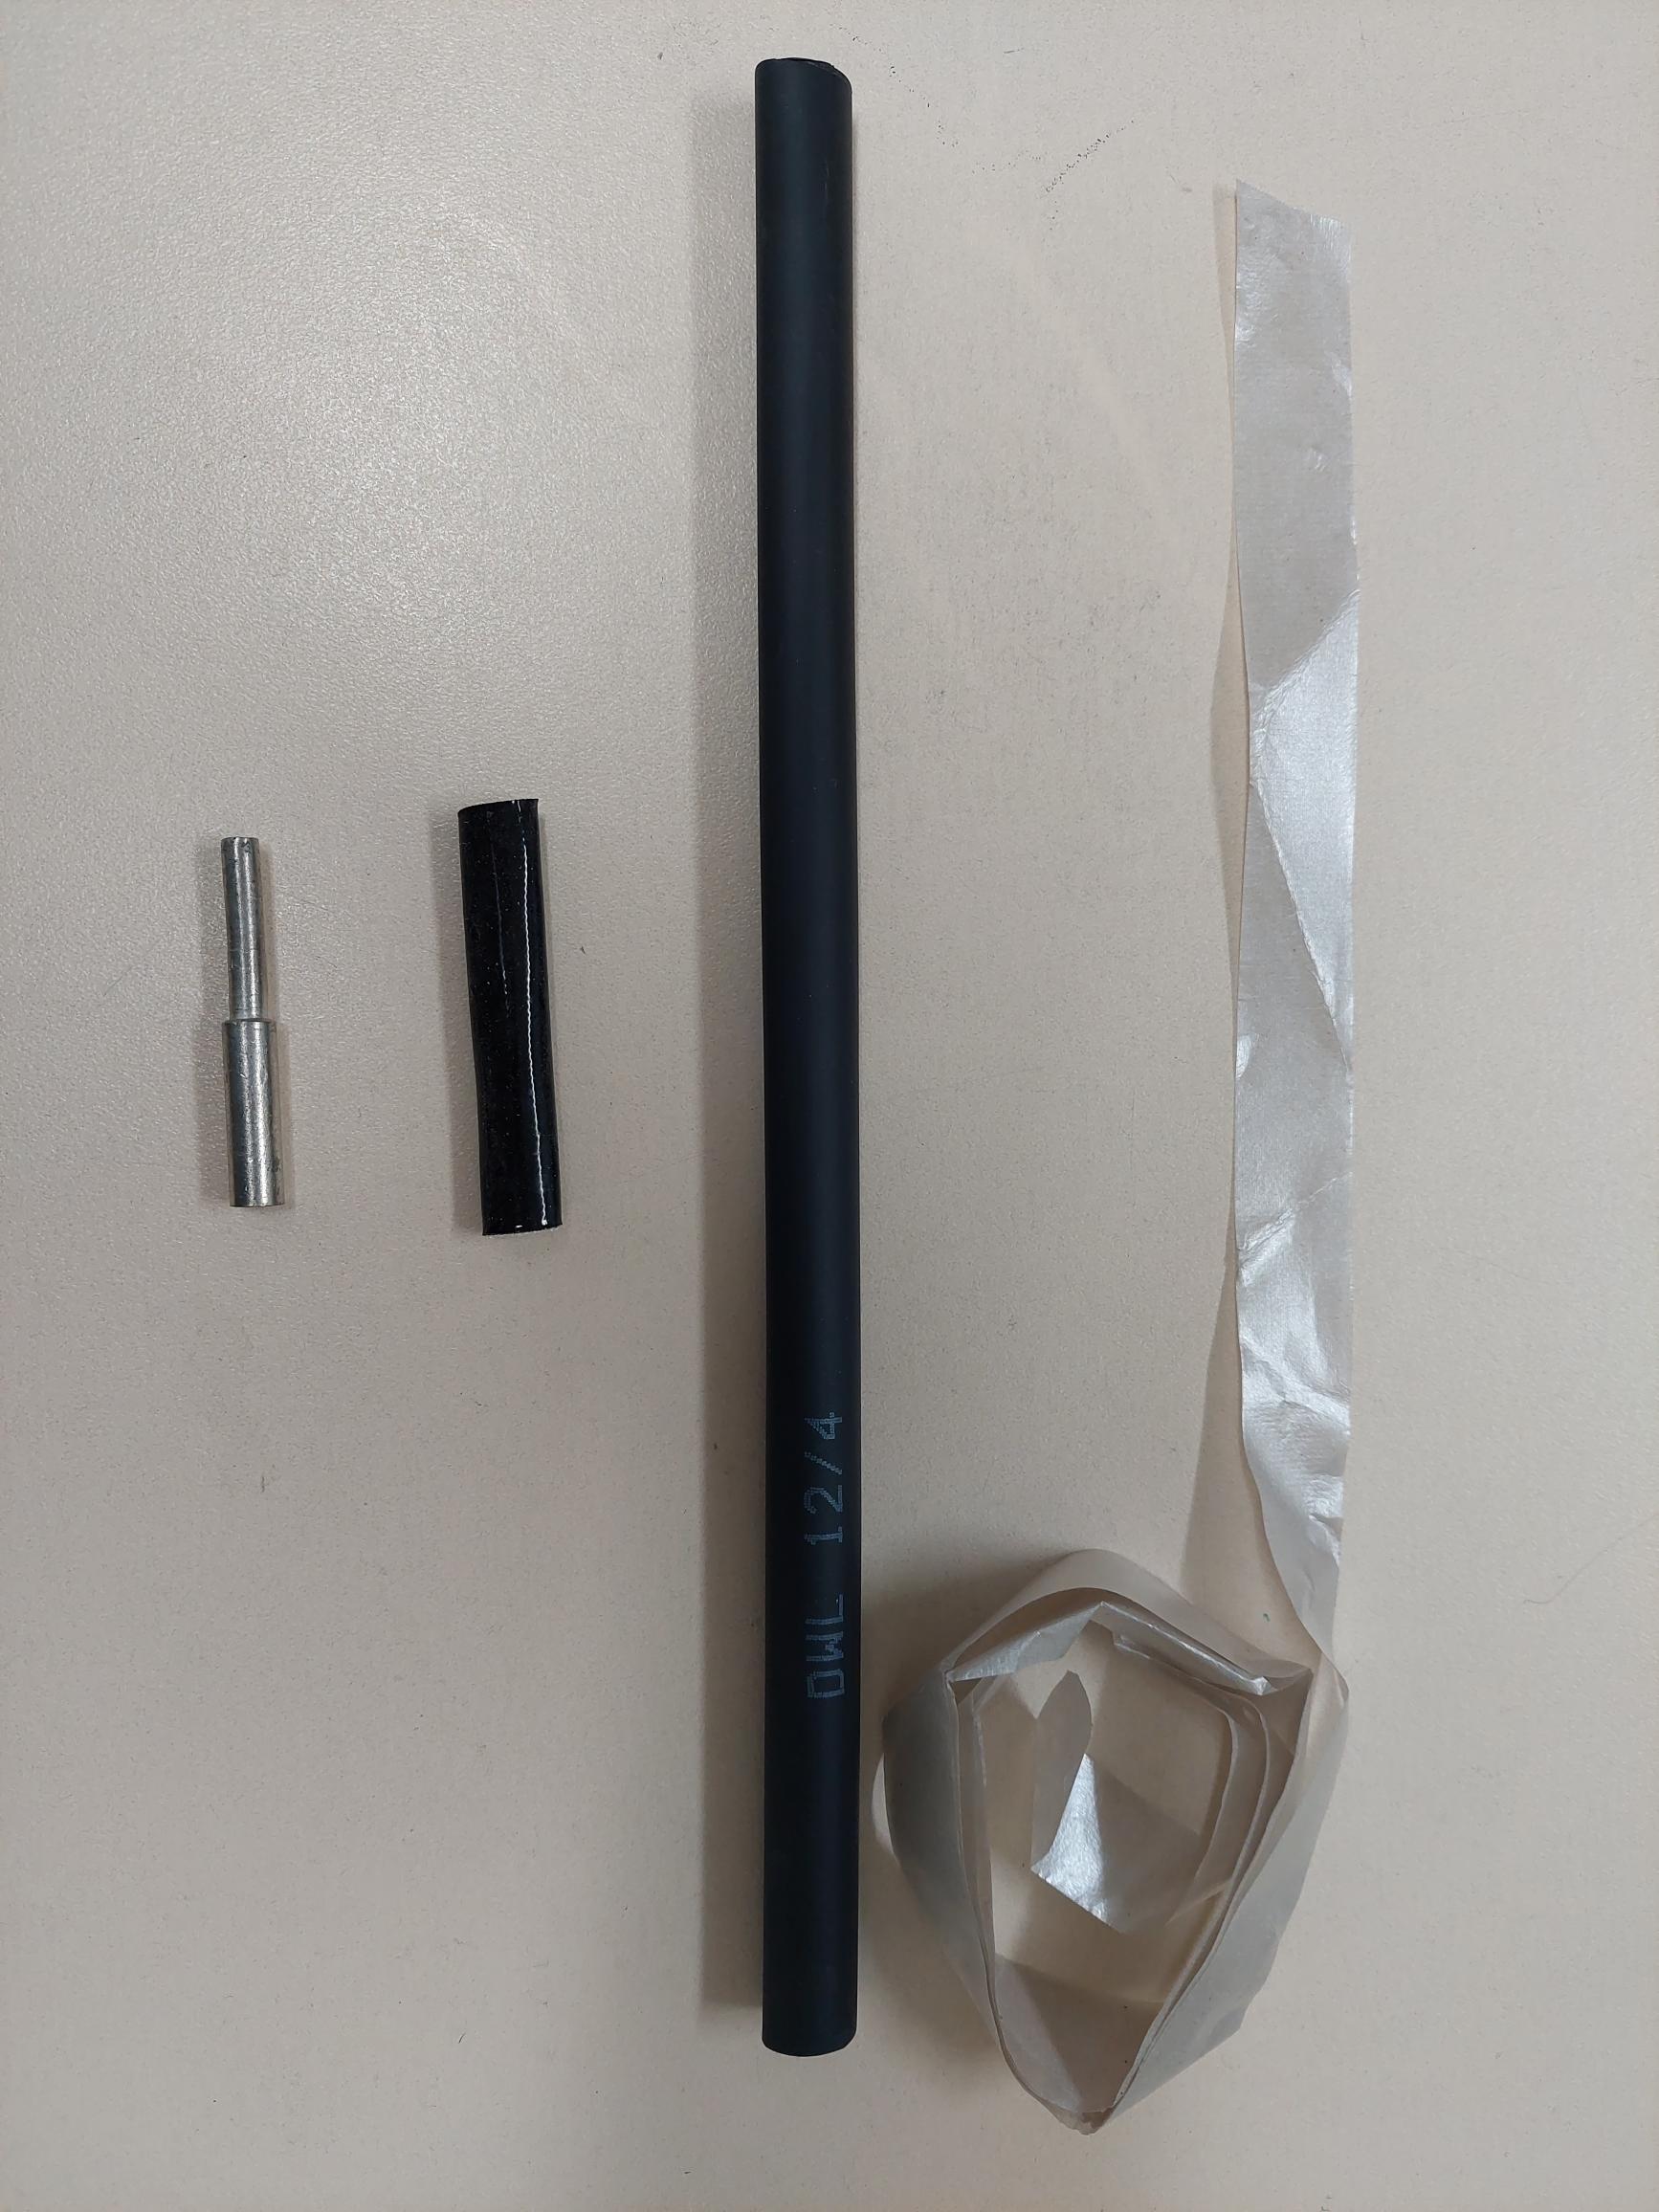 Plated copper Crimp Lug/Link, Glass Mica Tape, Silicone Impregnated Glass Sleeving/Braid, Adhesive lined Thick walled Heatshrink.
The Multi Core Kit consist of the same as the single but with each component multiplied by the core required.
The procedure to connect MICC Cable to Soft Skin Cable:
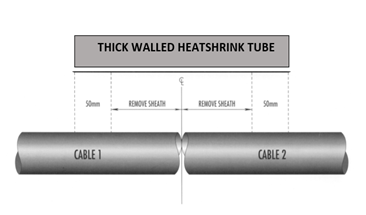
Step 1: Slide the large heat shrink tube over one of the cables.
Step 2: It is important to ensure then when the final heat shrink is applied it extends 50mm on both ends. The length of cable sheath to remove may be calculated thus:
Note: It may be necessary to minimise the diameter of the joint to allow for the application of the final thick-walled heat shrink tube. This can be achieved in a multicore cable by staggering the conductor joints.
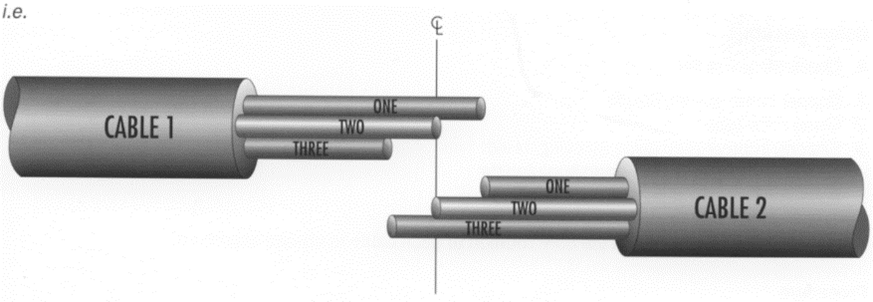
Step 3: Strip the insulation and glass mica tape, half the length of the link, from each core of each cable.
Step 4: Slide one piece of the silicone impregnated glass braid over each of the cores of one cable.
Step 5: Join corresponding cores using the crimp lugs/links provided.
Step 6: Apply the glass mica tape fire barrier. The tape should extend on the insulation by length approximately equal to the link length. The glass mica tape should be applied with the shinny side facing the conductor. Start on the insulated core opposite the silicone sleeve and apply the mica tape with a 50% overlap. Without breaking the tape, continue back across the crimped link finishing on the insulation. Secure the loose end of the tape with a small piece of adhesive tape (not supplied).
Step 8: Slide the glass braid over the glass mica taped cores. Located centrally.
Step 9: Slide the adhesive lined heat shrink tube over the join and locate centrally. Shrink the tubing, starting at the centre and working towards the ends to avoid air entrapment.
 Pyrosales supply all accessories and tool for all applications of MICC. MICC_Installation_Tools